NEW Tanstack Hotkeys Library is Amazing
Chapters7
This chapter introduces the Tanstack hotkey library and showcases five examples ranging from basic hotkeys to advanced features like recording and saving user shortcuts, illustrating how the library simplifies implementing keyboard shortcuts across projects.
Tanstack Hotkeys makes implementing custom keyboard shortcuts insanely easy, from basic hooks to advanced recording and per-target scoping.
Summary
Web Dev Simplified’s Kyle dives into the Tanstack React Hotkeys library, demonstrating how to wire up keyboard shortcuts with minimal boilerplate and strong TypeScript support. He starts with a basic useHotkeys example and shows how a string shortcut (like mod+S) auto-synthesizes to cross-platform symbols, with IntelliSense warnings if you mistype. Kyle then explores targeting hotkeys to specific page elements, toggling hotkeys on/off, and the conflict behavior options (warn, error, replace, or allow) to prevent accidental overrides. He also introduces held keys and key sequences, including multi-key combos like GG or a long custom sequence, plus a recording mode to capture user-defined shortcuts. The video then showcases a recorder flow that saves user-configured shortcuts to state and dynamically re-hooks listeners as keys change. Throughout, Kyle emphasizes TypeScript wizardry behind the scenes and teases a TypeScript utilities cheat sheet for further learning. If you want to implement global vs. scoped hotkeys with robust typing and a built-in recorder, this is a practical, hands-on guide.\n
Key Takeaways
- Use Tanstack/react-hotkeys' useHotkey hook with a string shortcut to get autocomplete and type safety.
- Modifiers (mod) map to Ctrl on Windows/Linux and Command on macOS, enabling cross‑platform shortcuts.
- Hotkeys can be scoped to specific targets or remain global, via the target option.
- Enable or disable hotkeys easily and choose conflict behaviors (allow, error, replace, warn) to avoid duplicates.
- Use the ignoreInputs option to let hotkeys work inside or outside form fields as needed.
- Sequence hotkeys support multi-key presses (e.g., GG) with a configurable timeout for detection.
- The library includes a hotkey recorder to capture and save user-defined shortcuts for preferences.
Who Is This For?
Essential viewing for React developers who want plug‑and‑play, cross‑platform hotkeys with solid TypeScript support and a built‑in recorder to empower end‑users to customize shortcuts.
Notable Quotes
"If you've ever used a website that has really great hotkey integration, you know how nice it makes the user experience."
—Kyle intro highlighting the value of good hotkey UX.
"This makes implementing custom hotkeys into your site incredibly easy."
—Claim about the library's ease of use.
"The problem though is if I'm on a Mac computer now, I need to press control. And really, most of the time when you want to have a shortcut on Windows, it's control plus whatever."
—Explains mod and cross‑platform behavior.
"This is a great way for us to modify our keyboard shortcuts, you can see we can put them however we want."
—Describes flexible shortcut definitions.
"I really love this library and everything that it can do."
—Kyle’s closing endorsement of the library.
Questions This Video Answers
- how do I implement cross‑platform keyboard shortcuts in React
- what is the mod modifier in Tanstack hotkeys and how does it map on macOS vs Windows
- how to create and use a hotkey recorder with Tanstack hotkeys
- what options control hotkey conflicts in Tanstack hotkeys
- how to scope hotkeys to specific elements in Tanstack hotkeys
Tanstack React HotkeysuseHotkeymod (modifier)hotkey scopeignoreInputshotkey sequenceshotkey recorderTypeScript utility types
Full Transcript
If you've ever used a website that has really great hotkey integration, you know how nice it makes the user experience. But implementing that all yourself is kind of annoying, which is where the Tanstack hotkey library comes in, cuz this makes implementing custom hotkeys into your site incredibly easy. In this video, I have five different examples of various complexity, showing you everything you can do with this library, all the way from a very basic hook up to a super advanced hotkey where you can record different hotkeys and save them for user preferences. This is going to cover everything hockey related you need.
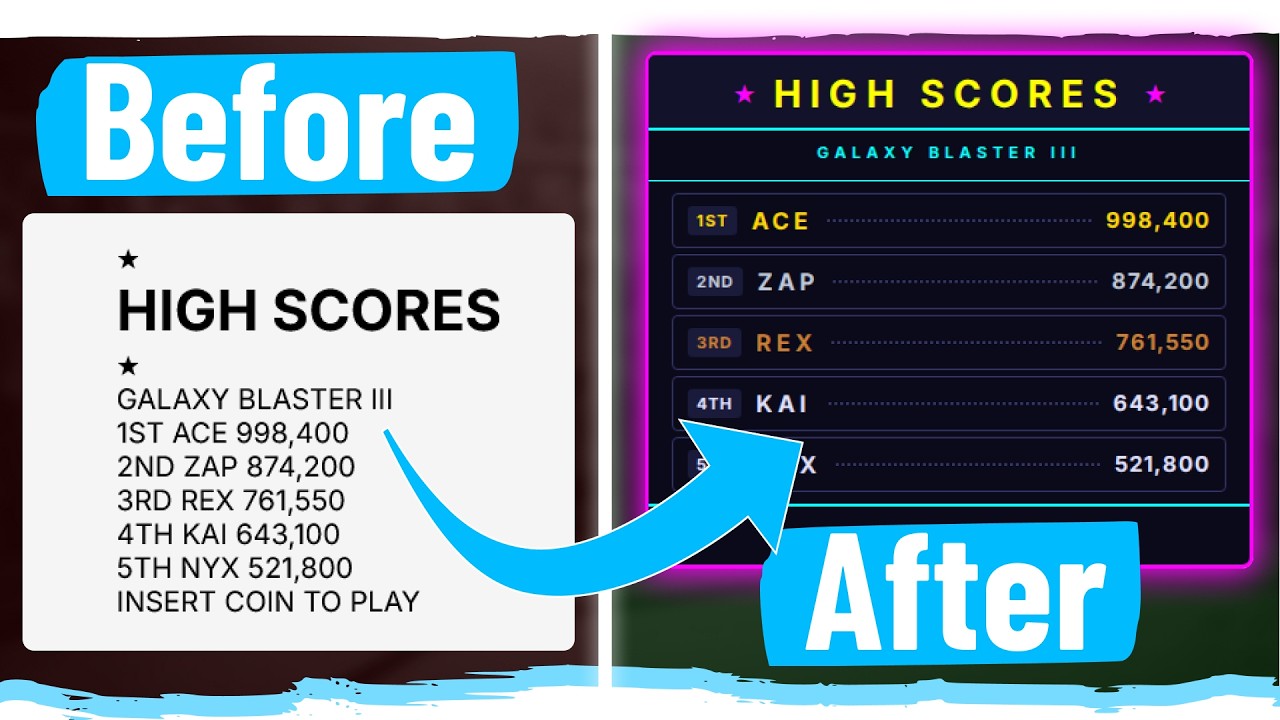
And once you see how this library works, I guarantee you're probably going to put it in every single project you have. Welcome back to WebDev Simplified. My name is Kyle and my job is to simplify the web for you so you can start building your dream project sooner. And before we actually start diving into the code, I just want to show you what this very basic example does. If I highlight on this screen here and I click anywhere, if I use the control S key, you're going to see it prints out the exact timestamp for when I click on that key.
And then it also says saved because I used the control S hotkey. If I use control- Z, you can see we get undo with a timestamp and control shift Z gives me redo as well as the time stamp. If I were to, for example, hold down one of these keys, you can see it just constantly uptick this time stamp because it's just repeating that keystroke over and over again from me holding it down. So, you can see I can press three different keys and it does three different things. Now, if we take a look at the actual code for how this works, we're installing that at tanstack/react-hots library that gives us this use hotkey hook, which is how we essentially handle everything on our project.
And this is a really simple hook to use. The first thing we do is we pass it a string for the hotkey we want to use. Now we could pass this as an object and lay out everything like this. But I find it's much easier just to pass it a string. And we even get full autocomplete and IntelliSense and type safety for this. So if I want to dotrl c for example, I could say controll + c and that is now going to represent that hotkey oftrl c. So if I just type over here z is undo and if I hit c that gives me that saved thing.
In our case, we would want this to be S cuz we're doing a saved type thing. The problem though is if I'm on a Mac computer now, I need to press control. And really, most of the time when you want to have a shortcut on Windows, it's control plus whatever. And on a Mac computer, it's going to be command plus whatever. This is where the idea of this mod right here. It stands for modifier. And essentially on Windows and Linux, that is going to represent the control key. While on a Mac machine, it's going to represent the command key.
So if I use mod plus S on a Windows machine, which is what I have, that's going to be control. So you can see here, if I hit control S, it's giving me that saved right there. While on a Windows or on a Mac machine, again, that's going to be the command symbol instead. So this is a great way for us to modify our keyboard shortcuts, you can see we can put them however we want. And if for some reason I had like a typo inside of here, I'm going to get a warning telling me, hey, that's not a valid shortcut.
Or if I like maybe spelled shift wrong, again, it's going to give me perfect IntelliSense warnings inside of here. The next thing we pass to this is just a function that represents what we want to do. Our function is just calling set log, which is just a string we're storing inside a state. And then later, we're rendering out what that string is down here. And all it's doing is appending on that timestamp. And then it's going to say saved, undo, or redo depending on what hotkey that I press. Obviously, in your actual application, you would make these hotkeys do something.
And that's what this function right here is for. Another thing that's really useful about this library is we have a format for display which will allow us to format these exact shortcuts how they would be on the user system. So on a Mac system for example here you can see it uses the Mac related symbols and on Windows it's using the words which is standard for Windows and Linux. So you can see here I type in mod plus S and it's showing up as control plus S on my screen cuz I'm learning on a Windows machine.
Again if I had an Apple computer this would show up with command S with all of the Mac specific symbols showing up there. Now, you may think that it's a lot of TypeScript wizardly for them to be able to get these different strings to show up the way they are. For example, here to get all this autocomplete and to be able to get warnings anytime, for example, you type something in incorrectly, but it's actually very easy to implement this type of TypeScript safety into your application. And if you want, I can show you real quick how to do it.
This is going to be a little bit of a tangent, but for example, I can come in here and I can just get a type that's going to be for our key. And let's say that our keys are going to be A and B. Those are the only different keys that we have. And then we can have a type here. For example, a modifier. Let's say our modifier is going to be either control or it's going to be shift. We're just going to make it super simple. These are the only modifiers and the only keys we have.
Now, if we want to create the combinations for those, that's going to be called combo. All we need to do is combine these together. And the really nice thing about TypeScript is we can use string interpolation to do this for us. So, we can just come in here with that string template literal syntax and we can add in what we want. For example, we want to have a key and we want to have a modifier just like that. And they are separated by this plus symbol. So now I've essentially created a very simple version of this type right here.
For example, if I were to create a variable A of that type of combo, you can see I get that all complete. A controlB shift A or shift A. It's got to be one of those different combos. Also, I probably want just my keys on their own. So I'm going to put or key. So now I can do A B or the control or shift combinations. And I could even take this further by making it so I can bind together multiple different modifiers if I wanted to as well. But that's a little bit beyond the scope of this cuz I just want to show you how easy it is to do these various different things inside of TypeScript.
And if you want to build a master TypeScript like this, I highly recommend checking out my full TypeScript utilities cheat sheet. It's right here. I have a light mode and a dark mode version. It'll be linked in the description. It's entirely free. It goes over every TypeScript utility that would be incredibly useful for you to learn. It just makes writing professional TypeScript code so much easier. Again, I'm going to link that down in the description for you. It's entirely free for you to check out. Now that we're done with that little tangent, just to show you how easy some of this is to actually write in TypeScript, I want to talk about some of the more advanced stuff you can do.
Because right now, these are just very basic hotkeys, which for 90% of sites is all you need. But there's a little bit of additional stuff we can do. I'm going to move on to this next demo to talk about some of the different things related to options you can pass along. Cuz I showed you you can pass along a hotkey and a function, but you can actually pass along three parameters. Here we have our hotkey, which is the escape key. Here we have our function, which is the thing that runs when we press that hotkey.
And then finally, we have options we can pass along. And these options can actually be a lot of different things as you can see. But the main one that I want to focus on in this particular section is the target because this allows us to determine which target it needs to be selected for this hotkey to work. For example, you can see I have a hotkey for escape. I have a hotkey for enter. And I have a hotkey for S. So if I click control S, you can see it's a global hotkey and it says save.
That's just cuz it's logging out right here how many times all these hotkeys have been pressed. So you can see as I save more and more, this number just keeps going up. Now, if I were to press escape, which I'm pressing right now, or I press enter, I press that a bunch of times, you'll notice nothing happens. And that's because again, they are scoped specifically to their targets. So, what we can do, if we go over this escape button, this one only works when I click escape. So, as I click escape, you'll notice it's now logging that out down here.
And if I click enter, nothing's happening at all. And if I hit control S, it's working just fine cuz S is a global hotkey. Now, this enter one is scoped specifically to the enter key. So, when I click enter, it works fine. But when I click escape, nothing happens. And again, of course, my global hotkey works. This is a great way to scope hotkeys to specific elements on your page when you need that type of situation to come up. But I want to talk about a few of the other options as well. For example, here we can enable or disable by just passing true or false to this.
This is a really easy way to just toggle these things on and off. So now you can see I'm clicking escape and nothing's happening cuz it's set to enabled of false. Now this conflict behavior option is a little bit interesting. It either is allow, error, replace, or warn. Essentially, this determines what happens if you try to set up two of the exact same hotkey in your application. Whether or not it's going to give you a console warning, which is worn, whether it throws an error, whether it completely replaces that hotkey, or it just allows both the hotkeys to work at the exact same time.
Generally, you're probably not going to have multiple hotkeys with the same exact key though to worry about. We also have event type. This is essentially key down, which is the default, or key up. So, it's based on if you press the key or release it. So, if you want to be able to change that around, we also have the ability for ignore inputs. This one is really interesting. I'm going to say true false value for this. And by default, it's actually kind of its own special hybrid where it's going to essentially only work in certain scenarios.
So ignore inputs just means if I have like an input field, a text field on my page and I click a hotkey, it's going to ignore some of those hotkeys, but it's going to work with some of them as well. So for example, if I have a hotkey for enter, for example, it's going to ignore that if I'm inside of an input because enter already does something on its own. Or maybe if I have a hotkey for just pressing A and I'm in an input, it should actually type the letter A instead of using my hotkey.
So it'll automatically force itself to use the correct behavior. But if you want to just always override that so your hotkey works no matter what, you can paste in true here and that's going to make it work no matter what. We also have this platform section. This just allows me to override what my platform is. So if I say Mac, it's now going to give me Mac specific keyboard shortcuts. This is really useful for testing. So you can see how things work if you don't have, for example, an Apple computer to work with. Also, we have in here prevent default, which is defaulting to true.
And we have stop propagation. This is just essentially calling E.prevent default on the event and E.Stop propagation. This is really useful because for example, if you normally hit Ctrl S on a web page, it tries to save your page and pop up a save window for you. But in our case, by default, the prevent default is already prevented. So when we click S, it's not actually doing the default behavior. It's doing our hotkey instead. But if you wanted to do the default behavior as well, you would just need to make sure prevent default was set to false.
Finally, the last thing that we have on here is the require reset. This is actually something that by default is false. And this is just do you need to repress the key for it to work again. For example, here if I just hold down the escape key, you'll notice that it constantly fires my event over and over again. If I change require reset to true, it'll now only fire this one time. If I hold down escape, you can see it fires one time. And now I need to let go and then repress the key for it to fire again.
This is really useful if you want to make sure your hotkey doesn't fire over and over and over again. I would recommend requiring reset to be true on almost every single hotkey. Now, that covers everything for this use hotkey hook. But there's actually multiple hooks inside this library. And the next demo that I want to talk about is going to be all about a new hook if we take a look, which is the use held keys and use keyhold hook. And this is just helping you determine which keys are currently being held down if you need to do different things on your site based on that fact.
So use held keys just gives you an array of all the different keys that are currently being held down. In our case, we're only tracking control, shift, and alt for the most part. So if I hold down control, you can see control is highlighted here and it says control down here. If I hold down shift, you can see both of those are highlighted. If I hold down alt, you can see all three of them are highlighted. And as I let go of and add down keys, you can see it's properly highlighting and unhighlighting these things.
Also, if I hold down other keys, for example, A, as H, whatever it is, those are showing up in the held keys section cuz like I said, use held keys shows you every single key being currently held down, no matter what. Use key hold is just a way of getting a true false variable on if a key is being held down or not. So if I hold down the shift key, this is shift held right here is going to return true because that key is being held down. And all I'm doing for my UI is I'm just mapping through those and if they're being held down, I show them with that highlighted state, otherwise I don't.
So you can see these hooks can be really useful for specific niche scenarios. Now the next demo I want to talk about is going to be yet again another hook and this is for keys that are based on sequences. So in our case, we have normal hotkeys, which is where you press one set of key combinations. But sometimes you want to have a hotkey that requires you to press multiple keys back to back. This is very common in something like Vim or even in VS Code. There's lots of multi-step key combinations. So for example, if I type G and then followed by another G, I can make that do something.
In our case, I'm just triggering something essentially highlighting it. So when I click GG, you can see it shows this was triggered for us, which is great. Now, if I click D twice, we get this second hotkey being triggered for us. And we can even make this combination as long as we want. For example, down here we're passing a super long combination of things. And if I were to type in all those different combinations, you can see this one has been triggered as well. And to do this hotkey for a sequence, all you need to do is just pass it an array of all the different hotkeys that you need to press in the order you want to press them.
And if those hotkeys are pressed in the correct order in the correct period of time, it's going to run the function inside of here. And you can even pass along some additional options. And there's a few additional things on here such as the timeout that allows you to actually modify how long you have to press this key combination in a sequence to make sure it properly triggers. And the really great thing is we can actually combine all of this together into our very own custom section for recording our very own hotkeys. So let me just enable that section and we'll go over to here.
And now if we take a look at our code, I have four different hotkeys set up for saving, searching, toggling, and formatting code. They don't actually do anything, but when I click the hotkey, it's going to highlight and say that I triggered that specific hotkey. But the nice thing about this is I can click on any of these hotkeys and change what the key is. So for example, search I'm going to change this to CtrlF instead. So now you can see that has changed to CR+ F. I type CR+ F and it fires that particular hotkey.
This is again all built directly into the library. And this is using the use hotkey recorder hook. This one is a much more complicated hook. So I'm going to kind of just give you a highle overview of exactly what's happening. But essentially it has an onrecord function. And this happens whenever you start the recording process for your hotkey. And then all you need to do is get the hotkey that's being saved for that. So if we scroll all the way down to where we have our buttons being rendered out, you can see each one of our buttons when we click on it, all we do is we call recorder.start recording.
So if we are not recording anything, we start the recording. So for example, I click here, I just call recorder.start recording. So what this is going to do is it's going to listen to my keys until I press something and once I press something, it's going to save that as my keyboard shortcut. So let's say that I just press the F key and I actually do this in the right location. So I come over here, I press F. Now that has saved that as my hotkey. And when I press that F key, what's going to happen is it's going to call the code inside on record and pass it along that hotkey that I have.
Now in our case, we're just saving this inside of state. So if you look up here, we just have a state variable that's holding all of our different keyboard shortcuts. So all we're doing is just saving that directly inside of state and nothing else is happening. Now, we're using that information down here. Each one of our hotkeys coming from that state variable are being set up with this use hotkey hook. And since everything is configured behind the scenes for you automatically, it's really nice because if these hotkeys change, it'll make sure to rehook up all of your event listeners for us so that all the code inside of here properly runs just like we expect it to.
So the important thing about this recorder is we essentially have this on record, which is whenever we record a keyboard interaction after we click that record button to start it, it's going to run this function for us. And whenever we cancel out of whatever we're doing, it's going to run this particular function right here. So, we have the ability to start and cancel recordings and it can a recording automatically ends as soon as we hit any combination of keys to make it work. So, again, I click on here. If I click the Y key, it now saves that to Y.
And anytime I click Y in the future, it's going to save the document or do whatever else you want. This is a perfect way to create configurable hotkeys inside your application. And the amount of code to do this is, I mean, just a couple hundred lines of code. And most of it is just styling and React related code. The actual specific code itself is really just these like 10 or so lines right here. I really love this library and everything that it can do. And if you're interested in how they do some of the really cool TypeScript wizardry, I highly recommend checking out my completely free TypeScript utility types cheat sheet.
It again goes over 18 different utility types that really make it so you can master TypeScript. It'll be linked down in the description below. It's entirely free for you to download. With that said, thank you very much for watching and have a good
More from Web Dev Simplified


Get daily recaps from
Web Dev Simplified
AI-powered summaries delivered to your inbox. Save hours every week while staying fully informed.