The Math Formula Every Game Developer Needs to Know
Chapters8
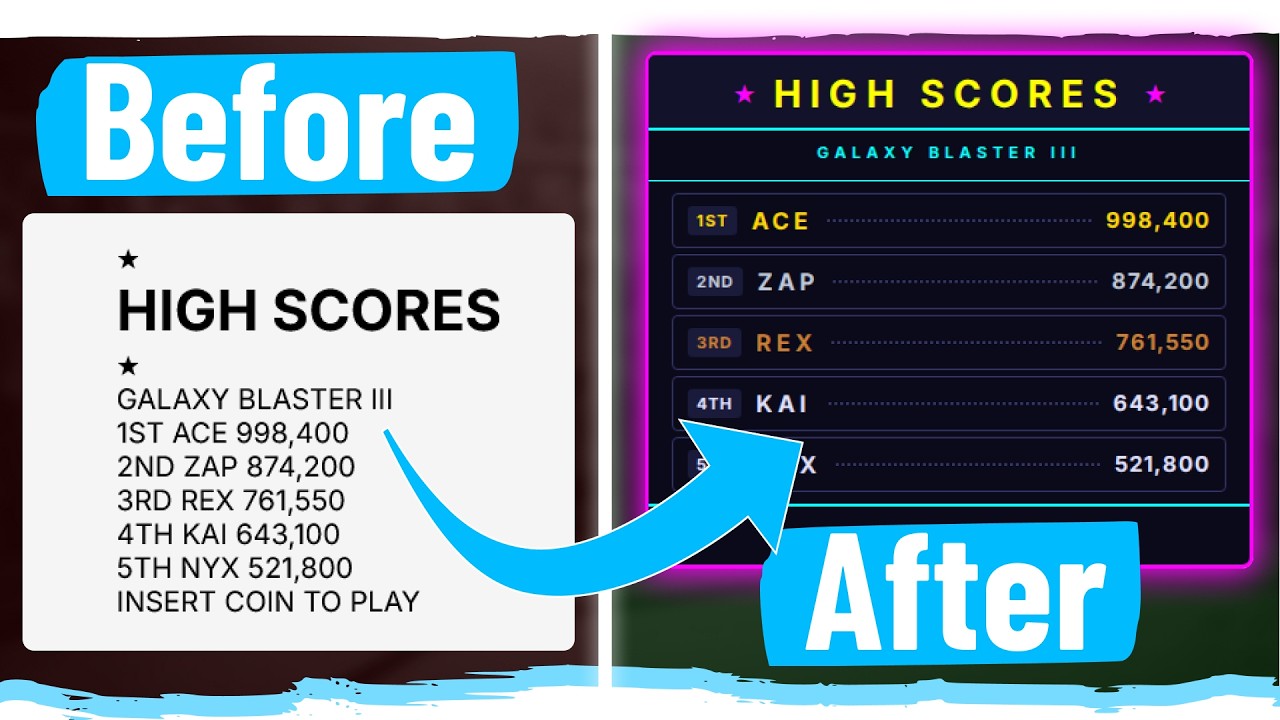
The chapter explains using the Pythagorean distance to detect circle-circle collisions in 2D space, by comparing the distance between centers to the sum of radii, and notes that squared distances can be used for efficiency. It also mentions planning for other collision techniques and demonstrates applying circle collision to interactions like player vs enemies and health bar animation.
A practical tour of a data-driven, modular 2D game starter kit: circle-based collisions, layered health bars, and a clean event-driven architecture that scales with assets and features.
Summary
Franks laboratory’s walkthrough centers on building a solid, reusable game boilerplate. The key idea is to treat game objects as circles for efficient collision checks using Pythagoras, with an option to compare squared distances for performance. Franks demonstrates how to structure code so different collision techniques can be swapped later, starting with circle-vs-circle collisions to handle player-enemy interactions and health bar animations. The presentation emphasizes a data-driven approach: assets (audio and image) are loaded from data files rather than hard-coded calls, making it easy to add new content. The video then guides you through creating a dedicated collision manager that delegates math-heavy checks to a collision system, while the game orchestrator (game.js) handles state and events. A small but powerful UX touch is a multi-layered animated health bar controlled via CSS variables and two layered pseudo-elements, updating in response to player health. Finally, Franks shows how to wire events so audio, UI, and gameplay react to events like player damaged or enemy dead without tight coupling. The session wraps with a focus on extensibility: you can plug in particles, more collision types, or additional UI components without bloating game.js. The lessons are reinforced with practical notes on code organization, using Promise.all for asset loading, and keeping data separate from logic—perfect for developers wanting a robust, reusable starter kit.
Key Takeaways
- Circle-based collision detection uses the distance between centers and the sum of radii, with an optional squared-distance optimization to avoid square roots.
- Assets become data-driven: audio and image files are loaded from data files via Promise.all and array mapping, so adding new assets requires only data changes, not code edits.
- A dedicated CollisionManager handles collision checks and responses, while a separate CollisionSystem contains the math, keeping game.js lean.
- A layered health bar uses two pseudo-elements (before and after) with CSS transforms and a health-percentage CSS variable to create a dynamic, animated effect.
- Event-driven architecture connects gameplay, audio, and UI: player damaged events trigger sound playback and health bar updates via listeners, decoupling systems for easier maintenance.
- Start-to-finish data flow shows how to reset UI on game restart, update health on damage, and keep assets and logic decoupled for future enhancements.
Who Is This For?
Essential viewing for JavaScript game developers building a modular 2D engine from scratch, especially those who want a data-driven asset pipeline, clean collision architecture, and polished UI elements like a multi-layer health bar.
Notable Quotes
""Pythagoras theorem lets us calculate the distance between two points in a 2D space, and we can use it to quickly and cheaply determine if two circles are colliding.""
—Describes the core collision detection approach for 2D objects.
""If the distance is greater than the sum of the radii, the circles don't touch.""
—Specifies the collision test condition for circle-vs-circle.
""Promise.all then takes all those promises and waits for every single one of them to finish before moving on.""
—Explains how asset loading is aggregated for efficiency.
""The load method expects name and path as parameters in this order as well.""
—Clarifies the API shape used for loading assets.
""When the player takes damage, the event is emitted.""
—Shows the event-driven trigger that coordinates systems.
Questions This Video Answers
- How can I implement circle collision detection in a 2D game using Pythagoras theorem?
- How do I design a data-driven asset pipeline for game development with JavaScript?
- What is the difference between a CollisionSystem and a CollisionManager in a game architecture?
- How can I create a multi-layer animated health bar with CSS for a game HUD?
- How do event listeners help decouple gameplay, audio, and UI in a game engine?
2D game developmentcircle collisionPythagoras theoremdata-driven assetsPromise.allimage manageraudio managerhealth bar animationCSS variablespseudo-elements ::before and ::after','CollisionManager','Event-driven architecture
Full Transcript
If someone asked me what the most crucial and most useful formula in 2D game development is, the answer would be straightforward. Pythagoras theorem lets us calculate the distance between two points in a 2D space, and we can use it to quickly and cheaply determine if two circles are colliding. In our game, so many things can be represented as circles. The player, enemies, world objects, projectiles, particles. [music] If we want these objects to interact, we need to be able to determine whether they touch or overlap. To check if two circles collide, we need to know where they are.
We treat their center points as two points in a 2D space and calculate the distance between them. We then compare that distance to the sum of the two radii. If the distance is greater than the sum of the radii, the circles don't touch. If it's less, they're overlapping. That's our collision. In practice, we can also skip the square root that Pythagoras normally requires and compare squared distances instead, which makes the check even cheaper. We'll structure our code base so that we can easily add other techniques later if we want to. Rectangle versus rectangle, circle versus rectangle, or even rotated polygon collisions using the separating axis theorem.
In this class, we'll put circle collision to work. We'll detect collisions between the player and enemies, create a player health bar, and make it animate whenever the player takes a hit. Source code for the project at this stage is available to download in the resources section below. I called it game starter kit part 16. Use it if you hit a bug and want to compare your code to mine or just save it as a checkpoint you can always come back to. I'll be providing source code checkpoints throughout this project to make sure everyone can follow along and nobody gets left behind.
By the end, we'll all have a well-structured optimized starter kit we can use to build many different games. Some elements like game timer and health bar will be hidden in main menu and shown during gameplay. So, let's put them inside a hot wrapper like this so we can control them at the same time. We will have health bar container and health bar fill. This simple markup is all we need. Notice they are inside the hot div. Let's give it some CSS styles. I want it to cover the whole page. So, position absolute and inset zero will stretch it to fill the entire viewport and cram it to all four edges of the screen.
I set pointer events to none to make sure it doesn't block mouse clicks and z-index 1000 to put it on top in front of all other elements. And because the timer is nested under hot, we can remove all the positioning code from the timer now since its parent container is handling it. I also [snorts] moved the timer a bit down. We'll control visibility of all elements nested under hot by setting display to none here. The timer and health bar will be hidden and shown that way. The health bar is made of a container and a fill.
So, let's style them. I set the container to position absolute. Give it a semi-transparent black background. Width of 50% height 25 pixels and now we can see it here. I add a white border. Overflow hidden. Position it at top 25 pixels and left 25% to center it horizontally. This is just CSS styling. Feel free to design your health bar however you like. For example, I can give it a comic book style by applying transform skew 20°. And then, add a box shadow like this. If you want more episodes in this series, let me know by hitting the like button.
I'm planning to wrap up the main game loop before implementing any genre-specific systems. I want to build a generic, flexible, and reusable boilerplate first. But, what are we missing? I'm looking for things that every game needs. Particle systems, sprite animation, what else should we add to this base? We also have health bar fill, which sits inside the container. I give it width and height of 100% of its parent, a red background, and position relative. We could leave it like this and simply update its width with the JavaScript based on the player's current health, and that would be the simplest approach.
But, if you want something a bit more interesting, we can also create a multi-layered animated health bar. I'll add before pseudo element to the fill. This requires a mandatory content property set to an empty string like this. Then, I set position absolute and inset zero, so it covers the full size of the parent element. Now, I remove the background from the parent and apply the background color to the pseudo element instead. Now, the visible fill of the health bar depends on the size of this pseudo element. If I set transform scale X to 0.5, you can see it shrinks from the middle.
I set transform origin to left to make it behave like a regular health bar. We will control the fill amount by setting a CSS variable, for example, health percentage, spelled like this, which will update from JavaScript in a moment. This line simply means scale the fill horizontally based on the value of this variable or fall back to one, meaning full width, if the variable isn't defined. But, as we said, we want to multiple layers. In CSS, we can create an after pseudo element. The difference between before and after is simply their placement in the element's content.
They behave the same way, but before is rendered before the element's content and after is rendered after it. Both of them will share most of this base code. And then, I'll define styles specific to each one. For the before element, I remove the solid background and instead give it a linear gradient. I rotate it 90°, so it goes left to right using a light red and white. I want a sharp break between the colors, so I set both stops to 85% like this. So, this basically means the first color fills up to 85% and then immediately switches to white at the exact same point, creating a hard edge instead of a smooth blend.
Then, I set transition. This means the transform animation will take 0.6 seconds, use an ease out curve, and start after a 0.5 second delay. I also give it a z-index of one. Now, for the after element, I give it its own gradient. For example, this color at 50% and this color at 50% as well. Notice again that both color stops are at 50%, which creates a sharp split instead of a smooth gradient. I set its z-index to two, so it appears in front of the before element. The key idea here is that the after element reacts to changes in the health percentage variable almost instantly, while the before element animates with a delay.
I can give the after element transition transform 0.2 seconds ease out, which makes it respond quickly. Now, when the health bar value changes, both layers scale at different speeds. After updates fast, and before lags behind slightly. And that creates this nice multi-layered animated health bar effect. HUD is the parent of the timer and health bar, so it controls their visibility. I can hide them by setting display to none here. I want HUD to be hidden in the main menu when the game first loads. I will control it from UI manager.js. To follow our existing pattern, I define a property for HUD element, and I point it to the HTML element using get element by ID.
I separated these blocks, and we also need access to the health bar. Notice we want the fill element, not the container. We no longer want to show and hide the timer, but the entire HUD div, which contains the timer and health bar. So, I rename this method to show HUD and hide HUD. And in all these four places, I want to target this HUD element variable. We renamed these methods, so now I have to go to game.js. And inside start game, instead of show timer, we call show HUD. And inside return to menu, we call hide HUD.
If your code base has other references to show timer and hide timer, they have to be replaced with show HUD and hide I start in the main menu. There is no timer, no health bar. I press play, and the health bar and timer appear. I can play the game, and when I quit to menu, the timer and health bar hide. We are trying to build a data-driven code base, but our audio and image assets are not data-driven. The load all method has all assets hard-coded as individual load calls. We want to follow a principle where we keep our data separated from our logic.
So, adding more content doesn't mean editing code. Inside the data folder, I create a new file I call audio data.js. I also add two more MP3 files to my audio folder, player hurt.mp3 and gameover.mp3. We will need these soon. You can use your own audio files, or you can download these in the resources section below if you're following along. Inside audio data.js, I export a constant called audio data. It will be an array containing one object for each audio file with a name and path like this. Notice that the load method expects name and path as parameters in this order as well.
For now, we have audio file for pause, unpause, button hover, button click, player hurt, and game over. All of them are MP3 files sitting inside the audio folder. So, here we have just data, no logic. I open audio manager.js. Up here, I import audio data we just created. Down here, we are hard-coding each sound as individual this.load call inside promise all. I delete all of this, and instead, I await promise all. And inside, we map over the audio data array. In JavaScript, the map method takes an array and produces a new version of it where every item has been transformed by a function you provide.
So, here we take each name path object and turn it into a call to this.load, passing its name and path, which returns a promise for each call. The job of this line is to load every sound file at the same time. It takes the audio data array, each entry being name path object that looks like this, and it maps over it to turn each one of them into a call to this.load, passing the name and path as arguments. Load method returns promise each time it's called, and Promise.all then takes all those promises and waits for every single one of them to finish before moving on.
So, now, instead of one hard-coded line per sound file, we have a single clean line that handles all of them. And adding a new sound file only means adding a new entry to audio data.js. This line automatically maps over all entries, so any new one is included automatically. I open image manager.js, and you can see we are doing the same thing here. Hard-coding each image asset as an individual load call inside load all. How do I make this data-driven? The player image will be defined inside player data.js, and enemy images are already referenced in enemy data.js.
So, I import both of those files up here. In enemy data.js, you can see each enemy type has an image property right here. Images we want to load will be coming from different data sources. So, inside image manager and its load all method, I create a variable I call image entries. It will be an array, a flat list of all images in our code base, so we can call load on each of them. To get all enemy images in, I use a spread operator on object values, passing it enemy data. Let me show you what this means step-by-step.
Enemy data is an object with named keys, drifter, seeker, and so on. It looks like this. Object.values strips those keys and gives us plain array of just the values, which looks something like this. Object.values is a built-in JavaScript method that extracts all the values stored inside an object and returns them as an array. Objects store data as key-value pairs. Object.values ignores the keys and just gives us the values. In our case, that means we drop the enemy names, drifter, seeker, and we keep just the objects containing their stats. Now, I can chain map onto that.
Map loops over every item in the array and transforms it into something new. For each enemy object, we only care about one thing, its image property. So, we use it to build a new, simpler object with just name and a path. It looks like this. This is exactly the shape our load method needs. Now, I need to get those entries into image entries. If I just put the map result directly without the spread, it would land as a nested array, a single item containing both enemies rather than two separate entries. We don't really want that.
We are using the spread operator, the three dots, to unpack that array so each enemy lands as its own flat item inside image entries, like this. And inside player data, I create an image property and name it the same as the image file I'm using for the player, in this case, player, like this. Back in image entries, I include it as a simple object where both name and the path are taken from player data.image, which basically resolves to this. Finally, just like in audio manager, I pass image entries into Promise.all with a map to this.load.
The load method takes a name and a path for each image and loads it. Now, any new entry added to enemy data with an image property is automatically loaded. Adding new enemies just means adding them to enemy data. No changes to image manager needed. I press play. Images and audio are still working, but now our assets are data-driven. Game Starter Kit part 17. Use it if you We have a health bar. We have a player that has health and can take damage, and we have a collision system with logic that can tell us if two objects overlap or not.
Now, I need to write the actual collision checks. I could simply put that code here inside the update method on the game class, but we really want to prevent game.js from becoming huge and dealing with everything directly. So, to stay organized, let's handle collision checks in a separate dedicated file. Inside the managers folder, I create a new file called collisionmanager.js. Inside, I export class collision manager as usual. The job of this file will be to handle collision checks and collision response. This way, game.js is just a pure coordinator. Collision manager owns all game logic and responses, and collision system contains only math.
It just stores our collision formulas. The constructor here will expect collision system because we'll need that circle on circle collision formula, and it will also need event emitter so that we can send out events when things collide. It will have an update method that will run over and over, and it will have a special method for each collision check we need. For now, we will check collision between the player and all active enemies. The update method will expect a player object and an array of active enemies as parameters. It will call this.checkPlayer versus enemies, and it will pass that player and enemies along as arguments, and that method will expect them.
Keep in mind that the enemies are reusable pulled objects with an active flag. So, just as a safeguard, I say if the enemy we are checking is not active, continue. The continue keyword here means stop checking this enemy and move on to the next one. If this enemy is active, we run this line of code, which will take collision system and its check circle circle method, and it will pass it the player as circle A and the enemy as circle B. This method will take the player and enemy, run the collision detection formula, and directly return true if the circles collide and false if they don't.
So, if this expression is true, if the player and this enemy we are currently iterating over collide, we take that enemy and set its active flag to false. For now, the enemies don't have health. They will be instantly destroyed when they touch the player. Then, a constant I call damage applied. It will be equal to player take damage, and as the amount, we pass it enemy.damage, the damage this particular enemy type is dealing. We have to make sure that our enemies have damage defined in the data, and that we are converting that data value into a property on the enemy class.
We wrote take damage so that it returns true. It's needed for when the player gets immunity later. For now, take damage always applies damage. So, if take damage returns true, if damage applied is true, we want to emit an event. Let's go to constants.js and prepare these events. Down here, inside the events object, I will add player related events. We will need player damaged event like this, just following the established pattern. And also player died, which we will need when we implement game over soon. We will also have some enemy related events, enemy damaged, and enemy died like this.
Back here, if the player took damage, I take this.events from the constructor, which is the event emitter, and we call its emit method. We want to emit events.player damaged. And as additional data, we pass it the player's current health, and player's max health. For now, since the enemy will be destroyed after one hit, we will also emit events.enemy died. And as additional data, we give it the enemy that was just destroyed. Game.js is our main orchestrator. As always, it just connects all of this together. Up here, I import collision system, which holds our circle-on-circle formula, and collision manager, which has the logic to check collisions between the player and enemies.
And it has this update method that I need to call over and over, so these checks actually run. I instantiate them here inside the constructor, as usual. Collision system first, because I need to pass it to collision manager as a dependency injection. I also pass it this.events, the event emitter, as the second argument. Collision manager expects both of these here. From inside the update method, we want to run collision manager update to actually do the collision checks. It will need the player and the list of all currently active enemies. Back here, render system also takes that list of active enemies, and now we need them in two places.
So, instead of calling get active enemies twice, I will cache it in a helper variable I call active enemies. It will be equal to enemy manager. Get active enemies. Enemies are reusable pulled objects. We only want the ones that are currently active in the game. Now, I pass that cached reference to render system and as the second argument to update. I updated signature to make sure active enemies are expected here. As the update runs over and over, we want to be calling collision manager update, passing it the player and active enemies. And this method will call check player versus enemies.
This method will use our custom check circle circle for the player and enemies to see if the player is colliding with any of the enemies. We are comparing player against the array of all active enemies, so I actually have to put it into a for loop that will cycle over all of them. Now, it's correct. Every time the update method runs, it will call check player versus enemies, but later it can also call check projectiles versus enemies or check player versus world objects, and so on. We will handle all our collision checks here. Check player versus enemies method will cycle over all active enemies.
If the player collides with an enemy, the player takes damage and we emit player damaged event and enemy died event. For now, enemies get destroyed on contact with the player. We are using circle versus circle collision, but we can also swap this for a different method later if we want. We can add rectangle and rectangle collision logic here or even some more complex ones. We are well organized for all of that. As the update method runs, we are running the collision checks over and over to make sure the code reacts when a collision happens. We are emitting the player damaged and enemy died events here, but we haven't registered listeners for them yet.
They don't exist in our event emitter. So here in game.js, I first move these lines here because all these are game state events and we will register player related event listeners here. On events player damaged, we want to register a callback function that takes the player's current health and max health. Here in the audio folder, we have player hurt mp3 file. We included it inside audio data under this name. So when the player gets damaged, we will emit a sound event. We can see that event expects the name of the sound we want to play, so I give it player hurt and the event will tell audio manager to play a sound with that name.
Here in collision manager, we are emitting an event, so I need to make sure I import events from constants.js. I also fix my typo here. This should be player damaged spelled like this. When the player takes damage, the event is emitted. We registered a listener for it here, which will react by doing a few things, but first it will emit a sound event to play the player hurt sound. If I save and play, if the player collides with an enemy, the player hurt sound plays and the enemy is destroyed. Inside UI manager, we have health bar fill element.
So, I create a new method I call update health bar. It will expect the player's current health and max health. If there is no health bar fill element, we return. Otherwise, we calculate the percentage, which will be the ratio between current health and max health. I wrap it in math marks and use zero here. This way, the percentage value can never drop below zero. Now, I take that HTML element we created earlier. I use its style attribute and I use set property to set the value of the health percentage variable to the percentage we just calculated.
This value will be anything between one, full health bar, and zero, empty health bar. So, 0.5, for example, means the player is at 50% health. This health percentage variable will be used here in styles.css inside scale X, like this. We use that variable to determine how wide this element is or use one as a fallback. One means full scale, original size. We are applying this to both before and after elements. And if you remember, we gave each one a different color and different transition speed and delay to create a layered health bar animation effect. Back in the game.js, on events player damaged, I register a listener that will make UI manager call this new update health bar method, passing it health and max health.
This method will calculate the ratio between the current health and max health and set that variable to that value to transform and horizontally resize the health bar fill element itself. Now, if I play, whenever the player collides with an enemy, the health bar animates to show the player's current health. Notice that if I quit and restart the game, the health bar needs to reset. In player.js, in its reset method, I set health back to max health. This will still do nothing because we are currently resizing the health bar only when take damage fires. But, when the game starts, we always want the health bar to be full.
So, I can go to the start game method and call UI manager.updateHealthBar directly here, passing it the player's current health and the player's max health like this. Now, if I play, hitting an enemy plays the player hurt sound. The enemy is destroyed, and the health bar animates with the nice two-layered animation we set up. This is how using events helps to make our code base more modular and decoupled. You can see how player damage event notifies audio manager to play a sound and UI manager to update the health bar. If we had a particle system, for example, we could just add that here to make it spawn a burst of particles, or we can do anything your game needs.
This is one of the cleanest ways you can handle a project like this.
More from Franks laboratory


Get daily recaps from
Franks laboratory
AI-powered summaries delivered to your inbox. Save hours every week while staying fully informed.