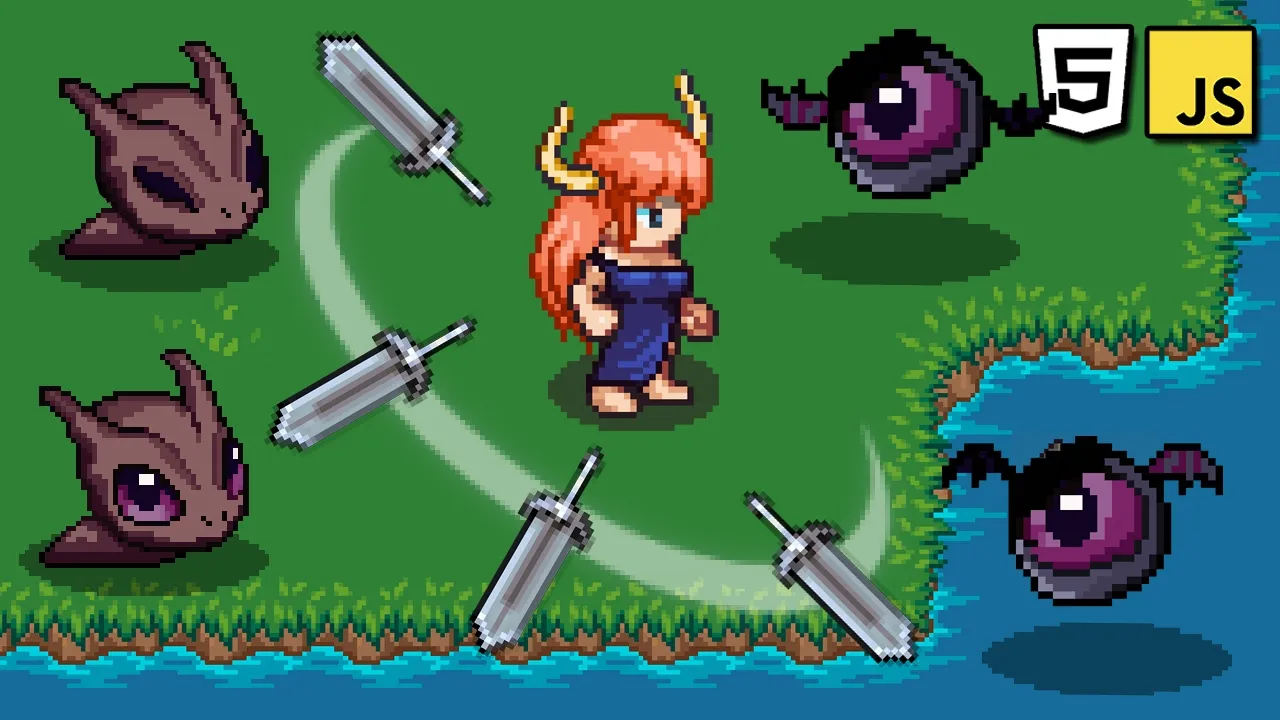
Your Games Need More Juice! Try this
Chapters12
The chapter discusses implementing a robust, data-driven collision and health system for enemies, including health bars, invincibility frames, push-back reactions, and a data-driven sound system, culminating in a flexible mission complete screen with multiple win conditions.
Franks Laboratory shows a data-driven approach to combat, UI, and feedback loops to make games feel responsive and polished, with practical, testable checkpoints and a data-driven mission system.
Summary
Franks Laboratory’s Part 19–23 delves into making games feel tactile through robust collision handling, push-back physics, and invincibility windows. Franks demonstrates denting the mystery around hit detection by introducing data-driven health and sound systems tied to each enemy type, plus a simple debug overlay to visualize hitboxes. He emphasizes UI modularity by swapping hard-coded IDs for data-action attributes, enabling scalable button handling across menus with one listener pattern. The video then layers in a mission-complete flow, configurable win conditions driven by enemy kills or survival time, and data-driven mission parameters stored in player data files for designers to tweak. He gradually extends enemy-player interactions to include push-back physics, per-enemy invincibility durations, and a mirrored collision response for both player and enemies. The series progressively ties these mechanics to a sound system that plays enemy-specific hit and death sounds via an audio manager, all orchestrated through a central event bus. Finally, Franks adds a optional debug overlay to render hitboxes and discusses future ideas like camera systems and particles, inviting viewer feedback. This part-through showcases a cohesive starter kit pattern (Part 19 to Part 23) designed to be dropped into new projects and checked against as a learning resource.
Key Takeaways
- Implement a data-driven health model where each enemy type has its own hit points, enabling fast fragile enemies and tanky ones that survive heavier punishment.
- Show health bars only after an enemy takes damage to keep the screen clean and make the first hit feel more satisfying.
- Introduce invincibility frames for both players and enemies (0.3s on enemies, 0.3s on players) to prevent rapid-fire damage and bug repro from AOE attacks.
- Replace per-button IDs with shared data-action attributes (start, resume, return to menu) and attach a single event listener per action type for scalable UI management.
- Add a mission complete screen with data-driven win conditions (kill count or survive time) stored in a mission data object for designers to tweak easily.
- Implement push-back physics with decay for both players and enemies, including immune-to-push-back cases where the player gets knocked back instead.
- Use a dedicated audio manager with enemy-type specific hit and death sounds defined in enemy data, triggered by enemy damaged and enemy died events.
Who Is This For?
Indie developers and students who want a practical, modular starter kit approach to building a 2D action game. Great for those transitioning from tutorials to real projects who need maintainable UI, combat feedback, and data-driven design.
Notable Quotes
"Every game still needs to handle body on body collision, and how you resolve that contact has a huge impact on how your game feels to play."
—Intro framing on collision impact on game feel.
"We switch to using data action attributes. The data action attribute is a HTML data attribute, a way to embed custom metadata directly on an element."
—Explains the move from IDs to data-action based UI wiring.
"When the mission complete event is emitted, we will run this domission complete. This method doesn't exist yet."
—Describes wiring for mission complete state.
"I want to add a new game state. Here in constants.js, I add mission complete like this."
—Shows data-driven game state extension for missions.
"If I go to collision manager, we know that we want these sounds to play whenever enemy damaged or enemy died events are emitted."
—Audio system linkage to collision events.
Questions This Video Answers
- How do I implement data-driven enemy health and invincibility frames in a 2D game starter kit?
- How can I replace per-button IDs with data-action attributes for scalable UI management in a game?
- What is a practical approach to building a mission complete screen with data-driven win conditions?
- How do push-back mechanics work for both player and enemy with invincibility and decay in a 2D engine?
- How can I set up an audio manager to play enemy-specific hit and death sounds based on enemy data?
Franks LaboratoryGame Starter Kit2D Game DevelopmentData-Driven DesignCollision DetectionInvincibility FramesPush Back PhysicsUI Data AttributesMission SystemAudio Manager
Full Transcript
Even if you're not making a game built around physical contact, no punches thrown, no enemies getting smacked around, every game still needs to handle body on body collision, and how you resolve that contact has a huge impact on how your game feels to play. Here's what I like to include in most of my games. First, a datadriven health system where each enemy type has its own hit point value. This lets you design fast, fragile enemies as well as slow, tanky ones that can absorb a lot of punishment. Once enemies have health, we'll need health bars.
I like to keep them hidden when an enemy is at full health and only show them once they've taken damage. This keeps the screen clean and makes the first hit feel more satisfying. We'll also add invincibility frames, a brief window after a hit during which an enemy can't take damage again. This prevents enemies from being instantly deleted by area of effect attacks and stops the same hit from registering multiple times, which is a very common source of bugs. Beyond detecting collisions will also need to react to them. I like to have a push back system that knocks enemies away from the player.
And we'll learn how to mark certain enemies as immune to push back so they push the player backwards instead. Sounds play a big role in how a game feels. So, we'll put together a datadriven sound system where each enemy type has its own set of sound effects for different actions. Taking damage plays one sound and getting destroyed plays another, all defined per enemy type in their data. We'll also implement a simple debug mode for drawing things that help during development. I'll start by drawing the collision hitboxes for both enemies and the player. Once all of this is in place, your game starts to feel much more reactive and a whole new set of mechanics and genres opens up if you want to take things further.
But before any of that, we're going to close the full game loop by adding a mission complete screen. And since this codebase is designed to be flexible and reusable, we'll build out a few different win conditions so you can tailor it to whatever your game needs. Source code for the project at this stage is available to download in the resources section below. I called it game starter kit part 19. Use it if you hit a bug and want to compare your code to mine or just save it as a checkpoint you can always come back to.
I'll be providing source code checkpoints throughout this project to make sure everyone can follow along and nobody gets left behind. By the end, we'll all have a well structured optimized starter kit we can use to build many different games. Inside index html, we have all the UI panels. The main menu, pause menu, game over screen, and now I want to add a new mission complete screen. Each panel has buttons, and these buttons all have unique IDs. Play button, resume button, quit button, and so on. We are targeting them individually inside UI manager and attaching separate event listeners to each one.
But some of these buttons actually share the same functionality. For example, both the main menu play button and the game over screens play again button both trigger the same game start event. As we add more panels, that approach gets repetitive and harder to maintain. So instead of giving each button a unique ID, we switch to using data action attributes. In the main menu markup, the play button goes from ID play button to data action equals to start. The data action attribute is a HTML data attribute, a way to embed custom metadata directly on an element.
Inside the pause menu, I'll replace resume button with a button that has data action resume. And the quit button gets data action return to menu. Inside the game over panel, the play again button gets data action start. The same attribute we already used on the main menuus play button up on line 24. They do exactly the same thing. So they share the same action. And I'll replace quit from game over button with data action return to menu. Again, the same one we used in the pause menu on line 34. Two different buttons, same behavior. Now the buttons are broken because we removed their ids and replace them with data action attributes.
So we'll go into UI manager to fix that. I'll completely delete this block where we are selecting each button individually by ID. And I'll also comment out these lines where we were attaching event listeners to each of them one by one. Instead, we select all buttons that share the same data action value. I start by querying all elements with data action start and for each one whether it already exists in the game or gets added in the future we attach a click event listener that emits the game start event. Every button in the codebase with data action start will now trigger that event when clicked.
Much cleaner and much more scalable. Then I use square selector all again to find all buttons with data action resume. For each of those buttons, we add an event listener. When clicked, it will emit the game resume event. And the third and final type of button we use across all our UI panels will be data action return to menu, which will emit the return to menu event. Hey developers, let me know what kind of game you're trying to build. Are you focused on ranged combat and projectiles, or did I convince you to throw in some uplose combat and punches as well?
Because beat them ups are a lot of fun. We could even make a beat him up rogue light glite out of this. Are you learning 2D first and planning to move into 3D later or is 2D your end goal? Tell me about your project in the comments. If you want to see more content like this, let me know by clicking the like. Subscribe to the channel or sign up for the email list to stay in touch. Now I will also select all elements with data action. So all the buttons of all three types and on mouse enter they will emit a sound event to play button hover audio.
Now I can add more UI panels and more buttons and I don't have to add any code here. Those new buttons will be automatically picked up as long as I use the data action attributes. Now I can actually delete all this code since we just replaced it. This is pretty clean now. Nice. If I play sounds are playing, the game is starting, pausing, resuming, and I can also quit to menu. Perfect. Let's create a mission complete screen. I created here just under the game over screen a div with an ID of mission complete menu. The header will say mission complete.
And if I add a play again button with data action start and a main menu button with data action return to menu, these buttons will be automatically picked up by UI manager and they will already work. I don't have to write any more UI code to handle them. Now let's handle the new panel. I create a new field for mission complete menu element and I add it here inside the array in hide all panels because this method will hide all panels including this one. I will close this for now. We will show this panel when we complete a mission.
To do that we will need a new game state. Here in constantsjs, I add mission complete like this. And we add some events. It depends on what we want to track as the mission complete objective. For example, we could trigger mission complete when a specific number of enemies was killed. So a new event I call enemy killed count. And we will also need a game state event for mission complete. Here inside gamejs, this is where we register listeners for game state events. and I want to add a new one. When the mission complete event is emitted, we will run this domission complete.
This method doesn't exist yet. And I register a listener for the enemy died event, which will run some code as a reaction to this event being emitted. Up here, I create a property. I call this enemy killed. Initially, I set it to zero. And when the enemy died event is emitted, I increase enemies killed by one. Then we want to broadcast that for other systems in our game. So I emit enemy killed count and I pass it the current number of enemies killed after we just incremented it. Then I will call a function called check mission conditions which we will write soon because the number of enemies killed will be one of the potential mission complete conditions.
Now we have to handle the state of the enemy skilled property when the game starts or restarts. I set it to zero. Inside the game loop that runs over and over if the game state is playing, we will be calling check mission conditions because maybe the win condition is also to survive for a specific time. Let's say the player needs to survive for 5 minutes. We have a very flexible code base so we can do all kinds of win conditions. But for now, let's trigger mission complete if a specific number of enemies was killed or if the player survived for a specific time.
We are writing this in a modular way so that we can easily introduce different win conditions if we want. The check mission conditions method will only run if the game state is playing. Otherwise, we will return. we will have an if block and if whatever win conditions we put here happen we will emit the mission complete event. Just for testing I can say if enemy skilled is more than two emit the mission complete event. We will also need a mission complete method which will set the game state to mission complete. We will take UI manager and call hide hut which will hide the player health bar and timer elements and we show mission complete menu.
We can also play a mission complete sound. I put a new audio file inside my audio folder. You can use any sound you want or you can download the same mission complete MP3 file I'm using here in the resources section below. Now we have to add it to our audio data object. The name will be mission complete and the path is the audio folder and mission complete MP3. All these sounds are automatically loaded. So I can already use it. When the mission complete method runs, we will emit a sound event. And the sound we want to play is the new mission complete audio.
So let's say when enemy killed is more or equal to two, emit the mission complete event, which will trigger a listener that will call the mission complete method. Right now, the only way to kill enemies is to collide with them. So I destroy one, two enemies and yes the mission complete panel appears. The hut the health bar and timer height and the mission complete audio plays. We can do a different condition here. We can check if this dot time is more than 60 seconds. Let's just do 3 seconds for testing. I play 1 2 3 mission complete.
Perfect. Main menu play. One, two, three. Mission complete. This is working. We can also combine the conditions if we want. For example, like this. If the player kills 10 enemies or survives for 60 seconds, the mission is complete. For testing, only two enemies again. One enemy, two enemies. Mission complete. I set this to 10. And let's test the time. 3 seconds for testing. One, two, three. Mission complete. Great. I set this to 60 seconds. So now mission complete happens if we kill more than 10 enemies or survive for 60 seconds. Whichever of these two conditions happens first will complete the mission.
Putting these values directly in code is not a good practice. We can also make this datadriven. I can create a separate mission data file or for now I can just create an object inside player data.js called mission data. Survive time will be 60 seconds and kill count will be 10. Putting the win conditions into a separate data file like this is good for designers who can just tweak these values here and don't have to hunt for them somewhere in our code. We have all mission data clearly visible here. So let's actually connect it in game.js.
I import mission data from player data.js. And down here inside check mission conditions, I check if enemies killed is more or equal to mission data kill count or if this dot time is more or equal to mission data survive time. Now it's connected. I set it to two for a quick test. One, two. Yes, we have a working mission complete functionality. Source code for the project at this stage is available to download in the resources section below. I called it game starter kit part 20. Use it if you hit a bug and want to compare your code to mine or just save it as a checkpoint.
You can always come back to I'll be providing source code checkpoints throughout this project to make sure everyone can follow along and nobody gets left behind. By the end, we'll all have a well ststructured, optimized starter kit we can use to build many different games. Now that we know how to give the player a temporary invincibility after getting hit to prevent it from getting stun locked or losing all health in a short period of time, let's do the same thing for enemies. Inside constants.js, I will export the constant. I will call it, for example, enemy hit invincibility duration.
And I set it to 0.3 seconds. This is how long the enemies will be invincible and immune to attacks after getting hit. It will work the same as invincibility duration we defined on the player. Here inside player data js, we define collision damage and set it to one. This is the damage the player will deal to enemies that collide with it. The goal is this. When enemy hitbox collides with player hitbox, the enemy takes one damage and becomes invincible for 0.3 seconds. I go to playerjs and I create a property called this.c collision damage and it will be equal to that collision damage value we just defined inside player data.
I close all this and inside enemy.js, I first import enemy hit invincibility duration from constants.js. J the enemy will have this doin invincible flag which is initially set to false. The enemy is not invincible. We will also need invincibility timer. The enemy will basically mirror how players invincibility works. I can literally copy this code block and I paste it up here inside the update method. If the enemy is invincible, the invincibility timer is counting down. When the timer reaches zero, we set invincible to false and reset invincibility timer to zero. Now you can see that both the player and enemy have this if invincible block inside their update method, which is usually a clue that some shared behavior could be extracted into a base entity class or reusable component.
For now, I think that would introduce unnecessary complexity. The duplication is still very small and keeping the logic local makes the code easier to follow during development. I will also copy the take damage and is dead methods and paste them here. This should use enemy hit invincibility duration for enemies. And now our enemy can actually take damage. If the enemy is invincible, we simply return. damage will not be applied and the rest of this code is skipped. If the enemy is not currently invincible, this block will continue and we reduce the enemy's health by the incoming damage, making sure it cannot drop below zero.
Then we set the enemy's invincible flag to true, set the invincibility timer to enemy hit invincibility duration, and return true. We also have a helper method called is dead which simply returns true if the enemy's health is less or equal to zero. Inside collision manager where we currently check for collisions between the player and enemies. We are immediately deactivating the enemy. Instead, I will delete this and create a constant I call enemy damage applied. This will be equal to enemy take damage method we just wrote. and we pass in the player's collision damage value as the damage amount.
We know that take damage returns false if the enemy is invincible or true if the enemy actually received damage. So if damage was applied to the enemy, this block will run. Here we emit the enemy damaged event carrying the enemy involved in the collision as payload. We already defined enemy damaged and enemy died earlier in constants.js. After that we check enemy is dead. If the enemy is dead meaning its health is less than or equal to zero only then we set active to false returning this reusable enemy object back to its object pool and emit the enemy died event carrying the enemy that died as payload.
That's it. And since damage now works both ways between enemies and the player, we will mirror this code block almost exactly for the player. Player damage applied will be equal to player take damage and the damage amount is whatever damage that enemy type deals. So enemy dot damage like this. If damage was actually applied to the player, meaning the player is currently not invincible, we emit player damaged event. And if the player is dead, we emit the player died event. We will also remove the enemy died event from here since it's now handled inside its own separate code block.
Inside render system.js, I define some module level constants. I want the enemy and the player to flash between 0.1 and 0.9 opacity while they are invincible. So I set flash min alpha to 0.1 and flash alpha range to 0.8. Flash speed will be 10. We also want to draw enemy health bars. So we define health bar height and health bar offset which defines height of the health bar and how far above the enemy sprite it should be rendered. Health bar bg will be a semi-transparent black color and health bar fill will use the same color as the player health bar we defined earlier in the styles CSS.
We can tweak these values later. Defining constants at the top of the file outside the class is good when these values are shared across the entire module and do not need to change per instance. It also makes balancing and tweaking visual effects much easier later. Notice that the player health bar was made from HTML elements styled with CSS because it is part of the permanent game UI. For enemy health bars, we draw them directly on the canvas because there may be many enemies on screen at once and their health bars need to move with them.
Now, we go to render player where we wrote the code to make the player's opacity flash while invincible. Instead of hard-coded values, I will use flash minalpha, flash alpha range, and flash speed, making the formula cleaner and more self-documenting. Enemy invincibility flashing animation will work the same. So I copy this code block and I paste it inside render enemies. If the enemy is invincible, we animate its alpha value between 0.1 and 0.9 for as long as the invincibility lasts. Since we are manipulating opacity, we have to reset global alpha back to one to make sure anything drawn after this is not affected.
Before testing everything, while we are here, let's also draw enemy health bars. I want the health bar to be invisible and only appear if the enemy has lost health. This creates less clutter on screen. And we know that an enemy without a visible health bar is at full health. Only if the enemy is not at full health, we call render enemy health bar passing it the enemy. This method doesn't exist yet. So let's define it. Render enemy health bar takes the enemy as a parameter. We calculate percent which is the ratio between the enemy's current health and max health.
This value will always be between zero and one. We draw the health bar at the enemy's position. The vertical Y position is the enemy's position minus health bar offset and health bar height placing it above the sprite. The width is the same as the enemy. We will set fill style to health bar bg. Draw the background with fill rectangle. Then set fill style to health bar fill and draw the fill using this formula width times the percent and we round it up using math seal to avoid tiny fractional values that could cause visual glitches when the enemy is low on health.
So here we are drawing the health bar as two rectangles. The black background will be a static size position at these X and Y coordinates. The width will be the same as the width of its associated enemy and height will be coming from this variable. The second layer of the health bar will be red and that one will actually scale depending on the current health of the enemy. Here we are setting the color of the second layer of the health bar. We are drawing the health bar as a rectangle passing it X Y width and height.
X and Y come from here. The width is calculated using this formula by multiplying the width of the health bar by the ratio between current health and max health. And we are rounding that value up. And the height of the rectangle is also a static value we defined in health bar height variable. Okay, this should work up here. If the enemy is invincible, we want to use enemy invincibility timer for this line of code to work correctly. I save and play. When an enemy gets hit, it will flash while invincible and it will display its health bar whenever it's not at full health.
If I go to enemy data, I will give Drifter five health and seeker 3. Keep in mind that a single collision with the player will deal one damage and the enemy will be invincible for 0.3 seconds. Actually, to make this effect easier to notice, I temporarily set enemy hit invincibility duration to 1.5 seconds. Seeker comes with no visible health bar. It collides with the player, loses one health, the health bar appears, and the enemy becomes invincible while animating the flashing opacity effect for 1.5 Let's try colliding with the drifter. Yes, the health bar appears there as well.
Now, we could create some reaction to these collisions. Maybe implement some push back. It's actually pretty easy, so we can do that next. Game Starter Kit Part 21. Use it if you to mine or just save it as a checkpoint you can always come back to. I'll be have a well structured optimized starter kit we can use to build many different games. When player and enemies collide, I want to apply some push back. We will have two types of enemies. Normal enemies get pushed away from the player and heavy enemies that are immune to push back will instead push the player backwards.
I will define a constant called push back decay. Its job is to gradually reduce the push back velocity over time, creating a smooth knockback effect instead of instantly stopping movement. Inside enemy data, I define a push back force which will control how strong the push back effect is when it gets applied. Then I define the push back immune flag which will determine whether the enemy can actually be pushed back or not. Notice that on drifter push back force is set to zero because push back immune is true. This enemy will not get pushed back when colliding with the player.
On the seeker, push back force is 380 because this enemy is not immune to push back. Push back immune is set to false here. So this enemy can be knocked backwards when hit by the player. Player will have a push back force of 320. The push back value on both the player and enemy determines how strongly that object gets launched when push back is applied. We have our data set up. So now how do we actually hook this up and make this work? First we have to store push back velocity on our enemies. Inside enemyjs I import push back decay from constants.js.
Then I define a field for push vx. Initially it will be set to zero. We will also need push vy. So this is the horizontal and vertical push back velocity. Basically the speed and direction of the knockback effect. Down here inside the update method we will apply and decay push back velocity. If push vx is not zero or push vy is not zero. If at least one of them has some non-zero value, we know the enemy is currently being pushed. I take this dox and plus equals the horizontal push velocity push vx multiplied by delta time to make the movement frame rate independent.
I do the same vertically. As the update method runs over and over, we are taking this doy and adding vertical push velocity push vy again accounting for delta time. So as long as push vx and push vy have some value that is not zero, we are making them affect the x and y position of the enemy. Then I want to calculate the current push back speed. This formula is based on the pythagoran theorem. It gives us the total magnitude of the velocity vector, meaning the overall push back speed regardless of direction. In this formula, we calculate the horizontal velocity squared plus the vertical velocity squared.
Then take the square root to get the final combined speed. Imagine a right triangle where push vx is one side of the triangle and push vy is the other side. We want to calculate the hypotenuse, the longest side opposite to the right angle. The hypotenuse in this case represents the total push back speed. So mathematically we are doing this which is essentially this here. Push vx represents horizontal velocity. Push vy represents vertical velocity. And the final result gives us the total velocity magnitude regardless of direction. Speed here is basically a single number representing how strong the overall push back movement currently is.
We need this formula because the push back is split across two axes horizontal and vertical. But when applying decay, we want to reduce the total push back strength evenly, not treat each axis separately. This allows the knockback to smoothly slow down over time while preserving its direction. Then we calculate decay which will be the constant push back decay value accounting for delta time again to keep it frame rate independent. So speed represents the current strength of the push back and decay represents how much push back velocity should be removed during this frame. Then I create an if statement to compare them.
If speed is less than or equal to decay, we do something. Else meaning the speed is still greater than the decay, the else block will run. If speed is less than or equal to decay, we know there is barely any push back left. So I set push vx to zero and push vy to zero which will prevent this block from running again because of the condition on line 59. Else meaning there is still enough push back force remaining. I calculate the ratio by taking speed minus decay divided by speed. This formula calculates what percentage of the original speed should remain after removing decay for this frame.
I'm taking speed, the current total push back strength, minus decay, which is the amount of push back I want to remove this frame. Then I'm dividing that result by speed again to convert this entire value into a percentage multiplier and saving it as ratio. This is a standard technique commonly used to gradually reduce vector magnitude while preserving direction. Remember that speed represents the current push back strength and decay represents how much of that strength we want to remove this frame. Because decay is always smaller than speed inside this else block. It means the result will always be a value slightly smaller than one.
For example, if speed was 100 and decay was 20, 100 minus 20 is 80 divided by 100 is 0.8. So the velocity keeps only 80% of its current strength this frame. Then on the next frame, the same process happens again, making the push back velocity smaller and smaller over time until it eventually reaches zero. Then I take push vx and multiply it by the ratio to reduce the horizontal push back velocity proportionally. I do the same vertically for push vy multiplying it by the same ratio value. So both directions slow down evenly because we multiply both push vx and push v y by the exact same ratio.
They both shrink proportionally. The relationship between them stays the same which means the direction of movement is preserved. Only the overall speed changes. This is a bit of math but don't worry if you've never seen it before. You don't have to fully understand it immediately. These formulas start making a lot more sense once you use them more often in game development. Just remember that this formula is used to calculate the total push back speed from the horizontal and vertical velocity values. And this formula is used to calculate how much of that speed should remain after applying some decay for this frame gradually making it smaller.
So to recap this code block, first we move the enemy using the current push back velocity. Then we calculate the total push back speed. We reduce that speed using decay and finally apply the reduced velocity back onto both the horizontal and vertical axis. So the knockback gradually slows down until it fully stops. So basically here we are applying push back velocity to move the enemy and then we are recalculating those velocities so they can be used again on the next frame with slightly less strength. This will repeat over and over as the update method runs until decay reduces the push back speed all the way down to zero.
At which point push vx and push vy will get reset to zero and the push back effect fully stops. While we are here just a minor cleanup I can replace this entire code block with a single line expression. If this evaluates to true face and left will be set to true. If the expression evaluates to false, facing left will automatically be set to false. So we get the same result, but instead of using a fiveline if else block, we can write it as a single cleaner expression because comparison operators already return a boolean value. So now I can delete this.
We have this code block that will run if push vx or push vy have some values, which means the enemy is currently being pushed around. But how do these values actually get set? How do other objects like the player apply push back onto this enemy? That will happen through this apply push back method. This method takes direction X, the horizontal direction of the push, direction Y, the vertical direction of the push, and force, which controls how strong the push back should be. Inside, we take push vx, which is normally zero when the enemy is not being pushed, and set it equal to the horizontal direction multiplied by the push force.
We do the same for push vy which becomes the vertical direction multiplied by the push force. So now the enemy has a way to receive push back from other objects through this apply push back method. And if the push velocities are no longer zero, meaning the enemy has been pushed, this code inside the update method will handle the movement and gradual decay of that push back over time. Inside the reset method, I also set push vx and push vy back to zero to make sure pulled enemies don't keep leftover push back velocity from their previous life cycle when they get reused again.
As we said before, some enemies will be immune to push back, but I still want the collision to visually resolve, so the two colliding objects separate from each other instead of overlapping permanently. So for enemies that are immune to push back instead of pushing the enemy away, it will be the player who gets pushed backwards from the collision. Inside player data, player has push back force set to 320. Now we will basically follow what we just did for the enemy. I open player JS and I import push back decay from constants.js. I create a field for push back force and it will be equal to player data push back force.
It will also have field for push vx and push vy and they will initially be set to zero. Exactly the same as we did inside enemy.js. Inside the reset method, I also set push vx and push vy back to zero. Inside the update method, we will check if push vx or push vy are not zero. If the player is currently being pushed, we apply the push back velocity to the player's X and Y position accounting for delta time to make sure the movement stays frame rate independent. We are mirroring exactly what we did for the enemy.
So next I calculate speed which represents the current total push back strength. We calculate it by combining the horizontal and vertical push back velocity into a single value using the Pythagorean theorem. Then I calculate decay which is the push back decay constant multiplied by delta time. This decay value represents how much push back strength should be removed during this frame. If speed is less than or equal to decay, we know there is barely any push back velocity left. So we set push vx to zero and push vy to zero preventing this entire block from running in the next call of update and stopping the push back sequence entirely.
Else means there is still enough push back strength remaining. And in this case, we calculate ratio, a value that represents what percentage of the current push back speed should remain after the K is applied. Then we apply the ratio by multiplying push vx and push vy by the same ratio value, effectively making sure that both horizontal and vertical velocity slow down proportionally while preserving the original push back direction. Then the rest of the update method runs. So exactly as we did for the enemy, as the update method runs over and over, if push vx or push vy have a value, meaning the player is currently being pushed, we first move the player using the current push back velocity, then reduce that velocity using decay, and then repeat the process every frame until the push back speed eventually reaches zero.
And now we need a method that will actually allow the player to be pushed. So apply push back which will take horizontal direction, vertical direction and force as parameters and apply the direction multiplied by force to push vx and push vy. This effectively gives them nonzero values so that the other code block inside update will start running handling the movement and gradual slowdown of the push back effect. Now both player and enemies are able to receive and handle push back values which directly affect their X and Y positions. We applied some nearly identical code to both player and enemy.
So if we end up doing this more often at some point creating a shared base entity class will start making more and more sense to avoid duplicated logic. Now both enemies and player can be pushed around. All we have to do is find a place in our code from which we want to call the apply push back method. The logical place for that will be inside collision manager down here inside check player versus enemies method. We are already checking if the circular hit boxes on the player and enemy collide. So this is the perfect place to also calculate push back direction and apply knockback.
We first want to calculate the horizontal and vertical difference between the player and enemy center points. So first I get dx the horizontal distance between the two objects. I calculate it by taking the horizontal center point the horizontal center position of the player minus the horizontal center position of the enemy. But their coordinates are stored in the top left corner of the objects because on canvas images and rectangles are drawn starting from the top left corner. We actually want to compare the middle points of the player and enemy rectangles because that is also where the circular collision hitboxes originate from.
That's why we take this dox of both player and enemy and add half of their width to get the center point. We do the same thing vertically for dy the vertical distance between the center points of the player and enemy hitboxes. Now we can calculate the distance between the two center points using this formula. We already used it multiple times in this codebase. This is just a standard distance formula based on the Pythagorean theorem used to calculate the straight line distance between two points. Now that we have the distance, we can calculate normalized direction values so that we can use them as push back directions.
And X short for normalized X direction is equal to this expression. This is called a turnary operator. We are using it as a short oneline if else statement. condition to evaluate if true question mark do this else colon do this. If the distance we just calculated between the center points of the player and enemy is more than zero and x will be the ratio between dx and distance otherwise it will fall back to one. dx divided by distance produces a normalized value usually somewhere between minus1 and one because we are dividing one axis of the vector by the total vector length.
If distance somehow becomes zero, meaning both center points perfectly overlap, dividing by zero would break the calculation. So we fall back to one as a safe default direction. We do the same thing for NY. If distance is more than zero, ny becomes the normalized vertical direction. Otherwise, it falls back to zero. One and zero here says move right. We could also do 0 and one to move down or minus one and zero to move left. Any of those would work as well. We just need to have some direction to fall back on so the push back calculation doesn't break.
Now we have nx and ny normalized directional values that we can use to apply push back consistently regardless of distance. So here we have two code blocks, one for enemy taking damage and one for player taking damage. This if block will only run if the enemy actually received damage, which means the enemy is currently not invincible. If the enemy is not dead and the enemy is also not immune to push back, meaning push back immune is set to false in enemy data, we call enemy apply push back and we pass it minus nx, minus ny and push back force coming from enemy data.
We know this method takes direction and force and applies them onto push vx and push v y. So the enemy update method can then handle movement and decay while the enemy is being pushed away. It expects horizontal direction, vertical direction and force. We pass minus nx and minus ny as the direction because nx and ny currently point from the enemy towards the player. By turning them into negative values, we reverse the direction. So the enemy gets pushed away from the player instead. For the player, it is similar. While we are inside this code block, it means the player is not invincible because damage was successfully applied.
Most enemies will get pushed away by the player, but some enemies might have push back immune set to true. These enemies will not be pushed away by the player. Instead, they will push the player backwards. If the enemy type has push back immune set to true, we call player apply push back. This time we use positive nx and n y values because these normalized directions already point from the enemy toward the player. So applying positive values here pushes the player away from the enemy. We also use player push back force which we defined earlier inside player data.
So to recap, we calculate dx and dy as the horizontal and vertical distance between two center points of the player and enemy. We use this formula to calculate distance and from it we derive nx and n y normalized directional values normalized x and normalized y. Then if the enemy is not immune to push back, we push the enemy away using negative direction values and the push back force defined in enemy data. If the enemy is immune to push back, it will instead push the player away using positive directional values and player push back force. If I go to render system here inside render enemies method, I can add one line that says if the enemy is not active for some reason, just skip it.
Even though render enemies already receives only active enemies, I still like adding this as a small guard just as a defensive check. Okay, back to push back. Let's play and see if enemies get pushed away. I wait for collision. This is seeker enemy, so it's not immune to push back. And yes, it does get pushed away when it collides with the player. Let's try the drifter enemy type. I don't really see the player being pushed away when collision happens. Inside data, I can see drifter's push back property is set to true. So, it should push the player away.
The push is either too weak because I'm pressing directional keys fighting against the push back as the player moves or something is wrong with the code. Let's try this. If I put this outside the conditional block that only runs if player received damage. I play and player is actually getting pushed away by the drifter enemy and enemies can push the player around even when the player is invincible which is something you might not want. I will get back to this in a minute. We want to see a proper push to make sure it's always happening when it should.
So, inside enemy data on seeker enemy that is not immune to push back, I set push back force to 580. And inside player data, I set push back force to 520. Let's play. And yes, this little seeker bot now gets pushed away correctly. We can clearly see the push now. And if player collided with the drifter who is immune to push back, the player gets pushed away. This works well. It would be nice if enemies had sounds that are type specific coming from enemy data and maybe also play a different sound not only per enemy type but also per action.
Let's say when enemy gets hit and when they get destroyed. We have all the infrastructure ready, so we can probably do that next. game starter kit part 22. Use it if you Before we move on to the sounds inside collision manager, I will put this block here. I want the player to be only pushed away by heavy enemies that are immune to push back if the player is not in an invincible state. When the player is invincible, it will be immune to damage and immune to push back as well. While invincibility frames are active, the player can walk through all enemies.
Inside gamejs, I will first update collision manager and only then call enemy manager update because collision manager can set enemy active to false when an enemy dies. If enemy manager update ran first, it would execute movement and behavior logic on enemies that are already dead this frame. By running collision first, any enemy killed this frame has enemy active set to false before enemy manager touches it. So it gets skipped cleanly with no wasted logic or dead entities. Here when the enemy died event fires I will remove check mission conditions. Check mission conditions is already called every frame in the game loop.
So calling it inside the event handler is unnecessary. We are calling it here on line 85. Right now we are subscribing to the sound event inside game.js. If I want to be better organized, I should let audio manager handle its own concerns. We are importing audio manager here and instantiating it here on line 20. I want it to handle its own events. So I pass this doevents to it. Keep in mind thisvents points to the events emitter giving audio manager the ability to subscribe or emit its own events. Now I can remove this line that subscribes to the sound event.
I will completely remove it from here. So right now no sounds will work in our game. We are passing this events into audio manager. So inside I will make sure the constructor expects it. Making the event emitter accessible in audio manager constructor. We will make audio manager register its own events using this method. I call it here in the constructor so that the audio manager automatically registers all its events right when it gets created. I pass the events parameter along and I make sure it's expected here. Here we will register a call back for the sound event.
The code we just deleted from gamejs. Whenever anything in our codebase emits a sound event, audio manager will react to it by calling its own play method and playing the sound with that name. I'm using events here. So I also have to import events. Now all the sounds work again. But the main sound event is handled by audio manager, not by game.js. The sound event calls play and passes the name of the sound we want to play. Just to be safe, I can also add a quick guard here. If the name is missing or not provided when calling play, return and don't run the rest of the code.
What if I want each enemy type to have a unique set of sounds? Let's keep our datadriven approach and start here in enemy data.js. I will define a sounds property and it will store an object containing key value pairs for all sounds this enemy type will need. Hit sound for this enemy type will be an audio file I called enemy drifter hit and death sound will be enemy drifter death. For the seeker, it will be enemy seeker hit and enemy seeker death. Doing this gives each enemy a unique personality and also audio confirmation for the player that key gameplay events like an enemy getting hit or destroyed actually happened.
I prepared a special set of audio files that you can download in the resources section below. It will give the Drifter enemy that's immune to pushbug a deeper voice in its set of sounds and the faster, more fragile seeker enemy will have more squeaky bug-like audio effects. That way, we can easily tell the sounds of each enemy apart like this. You can also use your own audio files if you want. It's up to you. After I put my MP3 audio files into the audio folder, I open audio data.js. And in here, I create entries for each enemy sound.
I give them names that match the sound identifiers referenced by enemy data. Enemy drifter hit, enemy drifter death, enemy seeker hit, and enemy seeker death. So audio data acts as a central list of all audio files used by the game. Audio manager can automatically load all audio files listed here when load all is called. So now where can we trigger these sounds from? If I go to collision manager, we know that we want these sounds to play whenever enemy damaged or enemy died events are emitted. These events carry the enemy that was involved in the collision.
We know that each enemy holds a reference to its own data. So from that data, we can directly look up which hit and death sounds should be played for that particular enemy. Inside enemyjs, I just double check that we actually have this data field that can be accessed. Here it is. And we know that enemy data has a sounds object for each enemy type that tells us exactly which audio file to play for the hit and death sounds of that enemy. The nice thing about this setup is that audio manager doesn't need to know whether the enemy is a drifter, seeker, or some future enemy type.
It simply reads the hit and death sounds directly from that enemy's data and plays them. That means if we add a new enemy later, we only need to define its sounds in enemy data and everything will work automatically. We said that we want each manager to handle its own concerns. So this is audio and it should be something for audio manager to deal with. Up here inside register events, we have our generic sound event that is still useful. We are still using it for things like UI sounds, pause and unpause and so on. This is good because the code emitting the event doesn't need to know anything about how sounds are loaded or played.
It simply requests a sound by name and audio manager handles the rest. For enemy damaged, I will register a separate event. We know that enemy damaged event when emitted here inside collision manager carries with it the enemy that was involved in the collision. So that's the enemy that will produce the sound. We make sure the callback function expects that enemy and we call this play and access enemy data sounds hit. This is the sound we want to play when the enemy gets damaged. I can add a question mark here. This is called optional chaining and we used it in this codebase before.
It's just a little safety guard for later to make sure our code doesn't break if we add enemy types that don't define a hit sound in their data. So far, we have hit and death sounds in the data. But maybe we will have enemy types that have more or fewer sounds defined later. Using optional chaining here makes our codebase more robust and flexible. Inside collision manager, we are also emitting an enemy died event which again carries the enemy that was involved as the payload. So inside audio manager, I will register a listener for enemy died and it will play enemy data sounds death.
Here inside audio manager, we have our generic sound event useful for sounds that can simply be requested by name. And we can also register listeners for specific important gameplay events like enemy damaged or enemy died. Here let's play to test it. Here inside the play method, we have a guard. This means that if no sound name is provided, we simply stop here and don't try to play anything. This works nicely together with the optional chaining we added earlier because if an enemy type doesn't define a hit or death sound, player will safely exit without causing any errors.
I play seekers play a type specific sound when they get hit and another sound when they get destroyed. Now I have to collide with the drifter which is not as easy because they are not chasing the player. Here's one. So let's see. And yes, it plays the deeper sound specific to this enemy type. I have to dance around a bit to deplete all its health so we can check if the correct sound plays when it gets destroyed. Yes, sounds that are specific to each enemy type are good for the polished feel of the game, but they're also a gameplay feature.
If the player is surrounded by a swarm of enemies, the sounds can help tell you which enemy type was actually involved in the collision. Especially if you give each enemy type a distinct set of audio effects like we just demonstrated here. Audio manager now registers its own events. We will keep this generic sound event here because it gives us a clean way to request sounds by name from anywhere in the game. For example, here in gamejs, we are using it to play the game over sound. We are using the sound event when the caller already knows the sound and we can use gameplay events like enemy died when the sound should be derived from data.
game starter kit part 23. Use it if you have a well ststructured optimized Debug mode is incredibly useful for looking under the hood of your game when visual feedback and gameplay feel aren't enough. Let's use it to draw enemy and player collision areas for now so we can see if our collisions are resolving correctly. We can use it later to draw other debug information like cooldowns, attack ranges and so on. I will start by defining a field. I call this debug. Here inside gamejs down here inside setup input I say if the key that was pressed is back tick which is a common key used to show and hide debug but you can use any other key on your keyboard you want instead.
If this key was pressed toggle debug mode on and off exclamation mark means if it's true set it to false if it's false set it to true. I make a comment to say that back tick toggles debug mode. Down here where we call render system render, I will pass this debug which can be true or false as the fourth argument. Now I go inside render system and I adjust the signature of the render method to expect debug as the fourth parameter defaulting to false like this. Then in the gameplay block when we are not in menu if debug is true we will call a custom render debug overlay method that we will write in a second and we will pass player and enemies along since we know we want the debug overlay to draw player and enemy hitboxes down here.
I will define it. It will expect player and enemies. And inside we will wrap everything inside save and restore built-in canvas methods to make sure whatever changes we make here to the canvas drawing context stay limited only to this method and don't affect other things drawn on the canvas after I set line width to one. Stroke style will be green for example. We can change this later in our game. So far we are doing circular collision detection. So hitboxes are circles to draw the player circle hitbox. I call begin path to start drawing arc method to define a circular path where I pass it X Y radius start angle and end angle as X and Y.
I will pass it the X and Y position of the player. Radius of the collision circle will be player collision radius. Start angle of zero and end angle of math.py time 2 will draw a full circle. Arc method only defines a path. To actually draw it, I have to call fill or stroke. I want just the outline. So I will stroke the path we just defined. I also make sure I spell collision radius correctly. Now, if I play and press back tick on my keyboard, you can see the collision circle being drawn around the player in the left corner.
We actually want to draw it around the center of the spreadsheet. That's where the collision hitbox actually is. I set line width to two pixels here. And I move the X and Y coordinates by half of the player's width and height to center it. Now the hitbox is drawn at the correct position. Let's go to player data and increase the collision radius. Now it's huge. And if I play test it, you can see the collision reactions happen exactly where the visual is showing us. I set it back to 28 pixels. Now I want to do the same thing but for enemy hitboxes.
So I will just copy this block and replace player with enemy. Player here is a single object but enemies is an array. So we have to loop over it. I do a simple for off loop here. If enemy is not active, we skip it. We don't want to draw it. Otherwise, we draw its hitbox from the middle of the spreadsheet with a radius value coming from enemy collision radius. I play I press back tick to toggle debug mode on. And if the player interacts with enemies, we can visually verify that the collisions happen exactly at the edges of the circles we are drawing.
So we know we are seeing the actual hit boxes inside enemy data. I set drifter collision radius to 30 and seeker to 50 just to see if the hitboxes and collision areas correctly resize. They react exactly where the circles meet. So we know everything in our code is connected. Great. I set this to 24 and this to 14. We have a debug mode. Later, we can draw more things here depending on which features we decide to implement. We're getting to a point where I'm running out of ideas for generic and non- genre specific features to add.
But there's still a few things we could do. Camera systems, particle effects, a sprite animation system. Let me know what sounds most useful to you. And if you have other ideas, leave them in the comments. I made this entire series based on your feedback.
More from Franks laboratory


Get daily recaps from
Franks laboratory
AI-powered summaries delivered to your inbox. Save hours every week while staying fully informed.